first, a couple of disclaimers: i am not the creative genius behind this block. i first stumbled upon this beautiful flower on pinterest. i couldn’t find where i could purchase the pattern, or even if i could. apparently it was a ‘block of the month’ pattern for Fat Quarter Shop. but here‘s where the original pinterest picture comes from. anyway, i did reverse engineer the block to how i want it. i wanted it to measure 16″ square (i have no idea how large the original block is) so i came up with my own pattern.
for my Sew Buzzy friends: this block is really cool, and i really hope you enjoy making it. but if you feel like it might be too taxing for you or time consuming, i understand (especially since we’re getting started a little late this month!) just send it on back and i won’t mind piecing it myself. i had such a blast with the first one. 😀
i hope this tutorial won’t be too long winded, and i’ll try to keep it as simple as i can. please read through it all before getting started. there are a few things i don’t want you to miss! but i promise it’ll be worth it.
this block measures 16.5″ unfinished. it’s a big ‘un!
- fabric A – 4.5″ square (1) – center block
- fabric B – 2″ square (4) – center block petals
- fabric C – 4.5″ x 2.5″ (4) – inside petals
- fabric D – 4.5″ x 2.5″ (4) & 2″ square (8) – middle petals
- fabric E – 4.5″ x 2.5″ (2) & 2″ square (4) & 2.5″ square (4) & 3″ square (4) – outside petal #1
- fabric F – 4.5″ x 2.5″ (2) & 2″ square (4) & 2.5″ square (4) & 3″ square (4) – outside petal #2
- fabric G – 4.5″ square (4) & 3.5″ square (2) – green leaves
- fabric H – 3″ square (4) & 3.5″ square (2) – neutral background
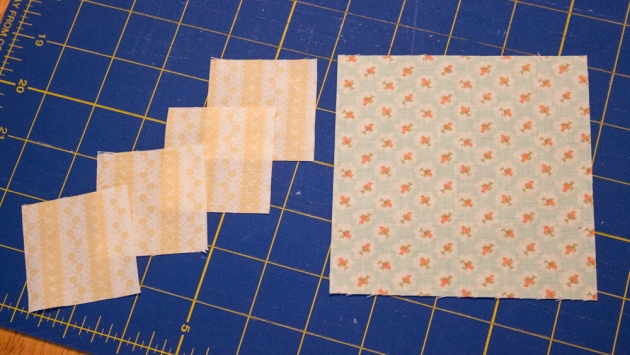
make the center block: made using one 4.5″ square of fabric A and four 2″ squares of fabric B.
lay each 2″ ‘petal’ block (fabric B) at each corner of the center block (fabric A). sew from corner to corner of the petal block to form four corner triangles. trim about 1/4″ from seam.

press petals out to form the center square. (Sew Buzzies: i pressed the seams open for this square, but i’m not fussy what you decide to do. i’ll let you know how i ironed my seams throughout, but it’s up to you if you press that way too…)

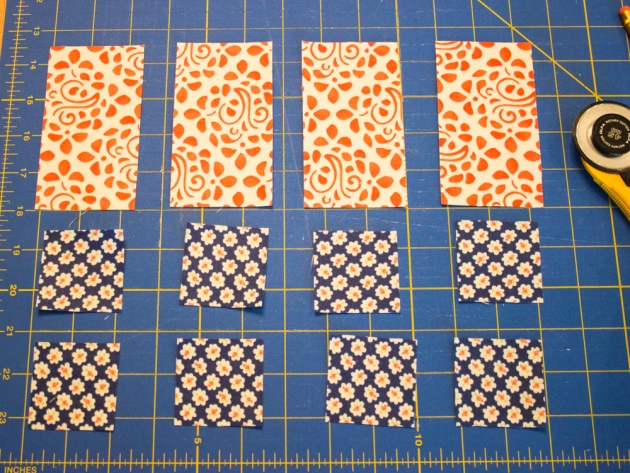
make the inner petal blocks: made using four rectangles of fabric C and eight 2″ squares of fabric D.
take each piece of fabric C and lay a 2″ square from fabric D at two corners of same long side. stitch from corner to corner as with the center block.
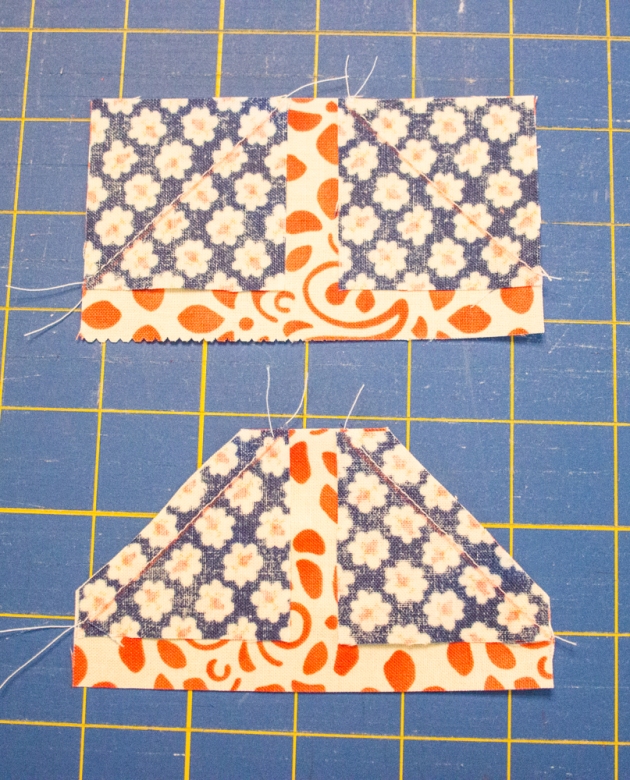
it’s kinda like making flying geese, except the ‘wings’ are a little smaller. trim the excess corner material and press (open). now you should have four ‘inner petal’ blocks.

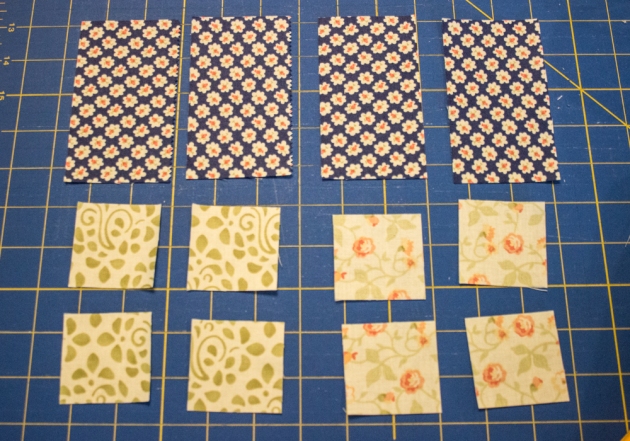
make the middle petal blocks: made using rectangles of fabric D and 2″ squares of fabric E & F. keep E’s with E’s and F’s with F’s!
repeat making the ‘flying geese’ type blocks as in the previous steps. you’ll have two sets of two ‘middle petal’ blocks.

now, let’s sew up a center strip! line up and sew blocks in this order, as shown: fabric E rectangle, middle petal block with fabric E corners, inner petal block, center block, inner petal block, middle petal block with fabric E corners and fabric E rectangle.

sew together side petals. arrange as shown (iron seams toward outside of block, away from center)

you should end up with two identical side petal blocks…

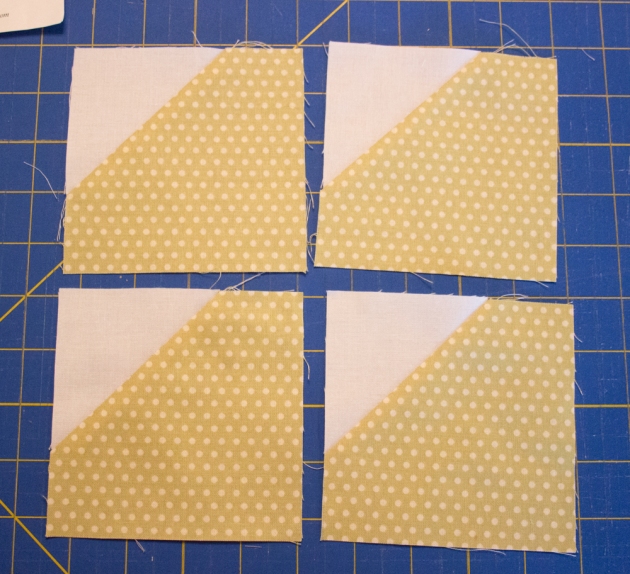
make outer petal joining block: using a 3″ square from both fabrics E & F, place together right sides facing and sew two seams 1/4″ from the center diagonal.

cut down the center diagonal to form two half square triangles. press (open). trim to 2.5″. repeat once more for a total of four HSTs.
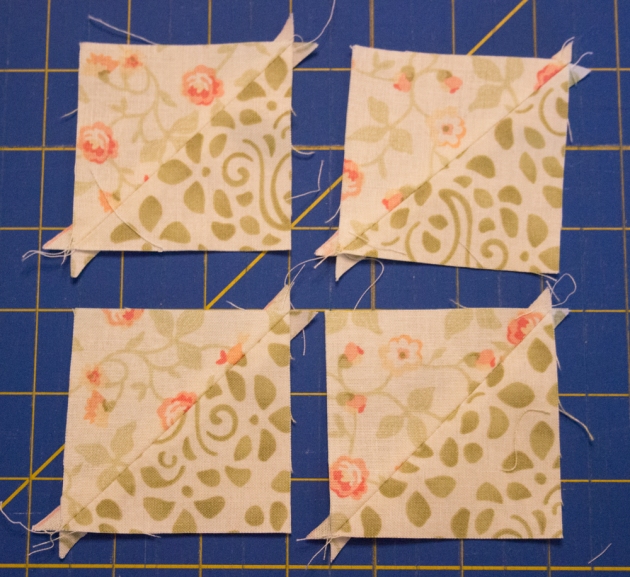
make outer petal/leaf joining blocks: take a 3.5″ green square, and 3.5″ neutral square and make two HSTs just like the previous step (except I pressed toward the green). trim down to 3″. (I missed a picture of this one, but hopefully you can tell it’s the square underneath:)

continue with these HSTs: lay a 3″ outer petal square piece, right sides together and again sew two seams perpendicular to the green/neutral seam 1/4″ either side of the diagonal. cut the diagonal to get a funky looking HST. (press toward largest triangle)

you should end up with eight total outer petal/leaf joining blocks: four each with fabrics E & F.
make corner leaf blocks: take your 4.5″ green square, and lay a 3″ neutral square at one corner. stitch along the diagonal and trim excess.

this time, press seam toward the leaf. repeat with all four leaf blocks.
now, here’s where it might get a little confusing. it might help to lay out all your blocks in the arrangement of the flower block so you can visualize where everything fits.
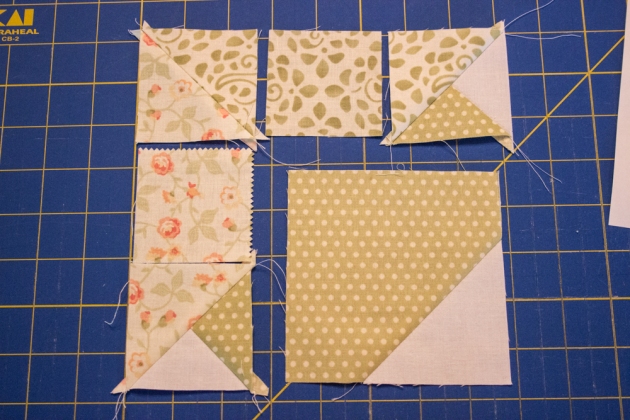
lay out the leaf corner block pieces as shown, matching fabrics E & F. first, stitch the top three pieces together and press (to inside)

NOTE: I have the top piece upside-down!! (I actually sewed it together before I realized. argh!)
next, sew the two left side pieces and press (inward). sew this side to leaf block first.

sew the top row to leaf pieces

et voila! a corner leaf block. you’ll end up with four of these: two will be the same with fabric E across the top and F down the left side, and two will be the same with fabric F across the top and E down the side. I hope this makes sense!
attach the leaf blocks to the side petal blocks as shown. take care to match fabrics E & F to their respective petals…
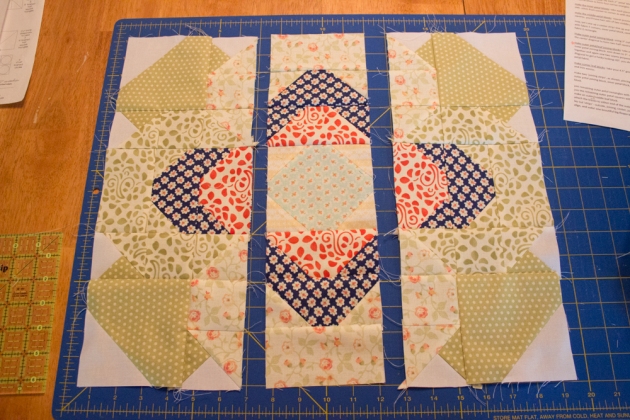
finally, sew the sides to the middle panel. this pattern is quite forgiving when it comes to matching seams, but the only place I pinned was at the center block seams. if they’re off, it’ll look a little out of place.

I can’t wait to see these guys in their different fabric combinations from my Sew Buzzy group. EEEK!
if any of the steps are confusing, please let me know, and i’ll do my best to clear things up! enjoy stitching!


